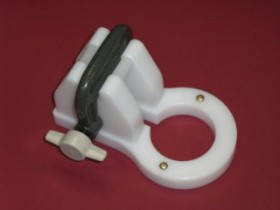
Tips for Using the SB1

A: Remove the metal portion of the mushroom set and sand the rubber
down so that the rubber no longer needs to be compressed to have the
metal impact the head of the rivet. While a minor improvement, the
distortion of the metal around the rivet will be reduced. The only
downside is that the mushroom set will no longer to appropriate for
single handed riveting without the SB1. As a contingency, the designer
purchased a replacement rubber holder to be able to go back to the
original mushroom set configuration, but to date has never once
needed or wanted to.
B: If there is only one cleco available to secure the SB1, or even none,
just use some tape to secure the SB1. This is useful when doing the last
few rivets in a line and no further clecos are available to clamp the SB1
to the structure. It is still better than attempting a unassisted single
handed rivet operation with an unaltered mushroom set. Yes it takes 30
seconds to do this, but plan the order in which you rivet to minimize
the occurences. The next tip can also be applied to substitute for one
or both clamping clecos not being available.
C: Use a plastic bar the width of a cleco where clecos would normally be
clamped, then use either tape or clamps on
the bar, it can be straight or be L shaped to make it easier to clamp
to the structure using stand alone clamps. It's worth it to prevent
setting a bad rivet that has to be redone, which takes far longer.
D: Make a special cleco or two by filing the lip off flush to the body
on opposite sides to make riveting around curved surfaces possible with
the SB1, such as the vertical stabizer, wing leading edges, or rounded
portions of a fuselage. Don't remove the entire lip or cleco pliers will
not work well.
E: Don't exclusively use a single cleco to clamp the SB1 in place, it
really is not a good idea, see B: and C: above to get around this.
F: Can be used with other sets, like a 1/2 diameter set from a C-Frame
by putting a 1/2 inch hole in a 1.5 inch dowel. If you make it offset
from center, it makes alignment adjustments possible. You can also
use this setup to hold a standard rivet gun set for AN470 type heads.
This can actually make setting AN470 revits easier with a reduced
chance of damaging the rivet head or having the rivet set bounce off
the head and damage the surrounding skin.
G: Another variation of the above, make a 1.5 inch diameter insert to
hold a pulled rivet gun head in place so it won't slide sideways right
after pulling the trigger and scratching the surface next to the rivet,
it does not have to be a really tight fit to protect the surrounding area.
H: If you have discovered the concept of back riveting with a bucking
bar on the skin and a back rivet set on the shop head, the SB1 can be
used to stablize a 1.5 inch diameter bucking bar. While back riveting
can be a bit more of a challenge, the results can often be worth it if
you can hold the bucking bar stable and square, something the SB1 can
assist with.
|